

The Ben Nevis Mountain Track is the most popular route to the summit of the highest mountain in the British Isles, yet it remains one of the most misunderstood paths in the Scottish Highlands Day Hikes. Often referred to by its former name, the Ben Nevis tourist route, this path is a serious mountain undertaking that requires physical stamina, proper equipment, and navigation skills. Rising 1,345 metres above sea level, the Ben Nevis walk is a relentless ascent that tests even experienced hikers, particularly when the notorious Lochaber weather closes in. This guide provides a definitive safety-focused walkthrough for those planning a Ben Nevis day hike via the standard Ben Nevis walking route.
Ben Nevis Mountain Track
The Ben Nevis Mountain Track is the primary artery for thousands of walkers aiming to reach the “Roof of Britain.” While it does not require technical rock climbing or scrambling in summer conditions, the sheer scale of the ascent—over 1,300 metres of vertical gain from the glen floor—places it firmly in the “strenuous” category. The Ben Nevis walk typically takes between 7 and 9 hours for a round trip, though this can vary significantly based on fitness and weather conditions. Understanding that the Ben Nevis tourist route is a high-altitude mountain environment is the first step toward a successful summit.
The path was originally constructed in 1883 to service the meteorological observatory at the summit, which is why it is also known as the “Pony Track.” Today, the Ben Nevis walking route is managed by the Nevis Landscape Partnership and the John Muir Trust. Despite its popularity, the Ben Nevis day hike claims lives every year, often due to exhaustion, inadequate clothing, or navigation errors on the summit plateau. This guide treats the Ben Nevis Mountain Track with the respect it deserves, focusing on the practicalities of reaching the top and, more importantly, getting back down safely.
Route Overview and Key Facts
Before setting foot on the Ben Nevis Mountain Track, hikers must understand the technical data of the route. This is not a casual stroll; it is a 16-kilometre (10-mile) round trip on rugged, often loose terrain. Preparation begins with the right map—the Ordnance Survey Explorer 392 (Ben Nevis & Fort William) is the gold standard for this area.
- Distance: 16km (10 miles) out and back.
- Total Ascent: 1,352 metres (4,435 feet).
- Typical Duration: 7–9 hours.
- Start/Finish: Ben Nevis Visitor Centre, Glen Nevis (NN 122 730).
- Terrain: Well-made gravel paths at the base, transitioning to steep, loose scree and large boulders on the upper sections.
- Difficulty: Strenuous. High levels of fitness required.
The Ben Nevis walk is a linear route, meaning you return the same way you came. While some experienced mountaineers choose the Càrn Mòr Dearg (CMD) Arête, the Ben Nevis walking route described here is the safest option for the vast majority of day hikers. Even on this “easier” Ben Nevis tourist route, the temperature at the summit is typically 9°C to 10°C colder than in Glen Nevis, and winds are significantly stronger. A Ben Nevis day hike should only be attempted if you are prepared for winter-like conditions at the top, even in mid-summer.
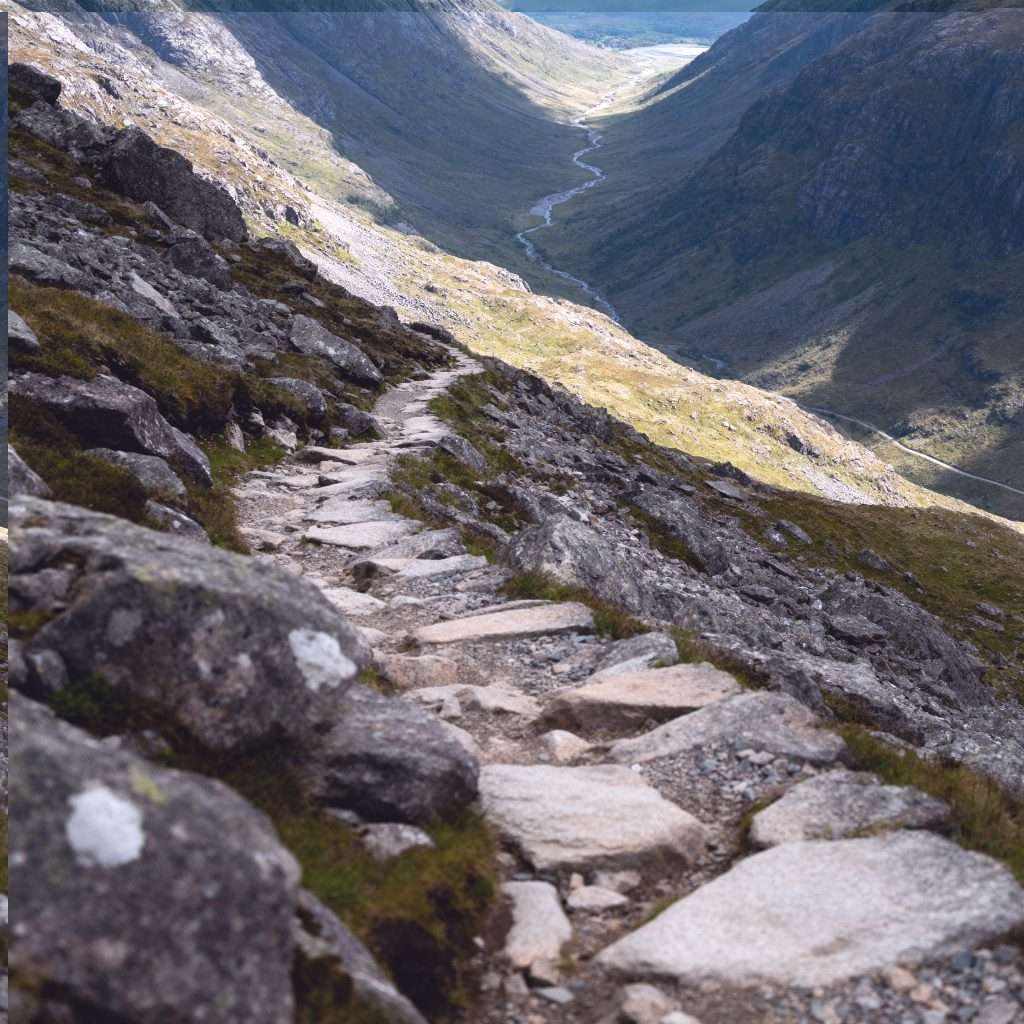
Starting Point and Parking at Glen Nevis
The Ben Nevis Mountain Track officially begins near the Ben Nevis Visitor Centre in Glen Nevis, approximately 1.5 miles from the centre of Fort William. For those embarking on a Ben Nevis day hike, arriving early is essential. During the peak summer months, the car parks are often full by 8:30 AM.
Parking Options:
The main car park at the Ben Nevis Visitor Centre (Postcode: PH33 6ST) is operated by High Life Highland. As of 2024/2025, the daily rate for a car is approximately £6.00. Payment can be made via coin-operated machines or by card inside the centre during opening hours. If this car park is full, the Braveheart Car Park is located further down the glen, though this adds a significant walk to the start of the Ben Nevis walking route.
Facilities:
The Visitor Centre offers toilets, a small shop selling maps and snacks, and a wealth of information regarding current mountain conditions. It is highly recommended to check the weather board here before starting your Ben Nevis walk. There are no toilets or shelter on the Ben Nevis tourist route until you reach the emergency shelter at the summit, so utilize the facilities at the base. The Ben Nevis Mountain Track is a “Leave No Trace” area; ensure you have a plan to carry all waste, including organic matter like banana skins, back down the mountain.
Step-by-Step Mountain Track Route Description
The Ben Nevis Mountain Track can be divided into four distinct stages, each offering different challenges and scenery. Following the Ben Nevis walking route correctly is vital to avoid straying into the dangerous terrain of the North Face.
Stage 1: The Initial Climb to the Lochan
From the Visitor Centre, cross the wooden bridge over the River Nevis and turn right. Follow the riverside path until you reach a signpost directing you left toward Ben Nevis. The Ben Nevis walk begins in earnest here, climbing a well-constructed gravel path that zig-zags up the western flank of Meall an t-Suidhe. This section is often surprisingly warm as it is sheltered from the prevailing winds. After approximately 2 kilometres, the path levels out slightly as it skirts the “Halfway Lochan” (Lochan Meall an t-Suidhe). This is a common spot for a first break on the Ben Nevis tourist route, offering views back down toward Loch Linnhe.
Stage 2: The Red Burn and the Lower Zig-Zags
After passing the lochan, the Ben Nevis day hike takes a sharp turn to the right (east) to cross the Red Burn stream. This is a critical landmark. In heavy rain, this crossing can become difficult, but usually, it is a simple step-over. Beyond the Red Burn, the Ben Nevis Mountain Track becomes significantly rougher. The path begins a series of relentless, wide zig-zags. The smooth gravel is replaced by uneven stones and steps. This is often the most mentally taxing part of the Ben Nevis walking route, as the summit remains hidden from view behind the bulk of the mountain.
Stage 3: The Upper Zig-Zags and the Plateau
As you gain height, the vegetation thins out, leaving only rock and scree. The zig-zags become tighter and steeper. At around 1,100 metres, you will reach the edge of the summit plateau. The Ben Nevis walk changes character here; the gradient eases, but the terrain becomes a boulder field. Large navigation cairns are spaced every 50 metres to guide walkers through the mist. It is essential to stay on the Ben Nevis Mountain Track here, as the cliffs of the North Face are only a short distance to your left.
Stage 4: The Summit
The final stretch of the Ben Nevis walking route leads across the plateau to the highest point. You will pass the ruins of the old observatory and the emergency shelter (which sits atop the ruins). The summit is marked by a large cairn and an Ordnance Survey triangulation pillar. On a clear day, the views from the Ben Nevis tourist route summit are unparalleled, stretching to the Cuillin of Skye and the peaks of Glencoe. However, the summit is shrouded in cloud roughly 300 days a year, making the descent the most dangerous part of the Ben Nevis day hike.
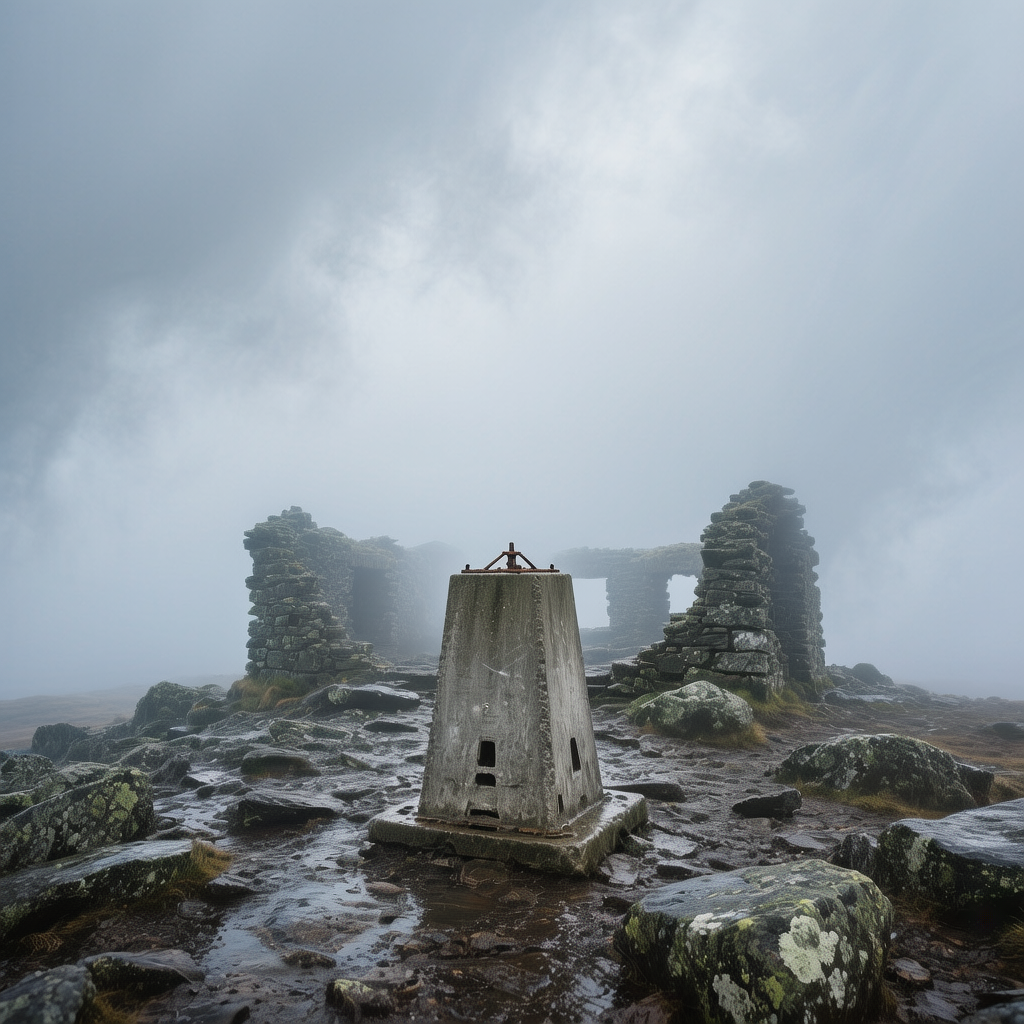
The summit of Ben Nevis showing the trig point and the ruins of the Victorian observatory in the mist
Difficulty, Weather and Navigation Challenges
The greatest danger on the Ben Nevis Mountain Track is not the ascent, but the descent in poor visibility. The summit plateau is a featureless expanse of grey boulders where it is incredibly easy to become disoriented. To the north lie the vertical drops of the North Face; to the south-west lies Five Finger Gully, a notorious “terrain trap” that has claimed many lives. When the mist descends, the Ben Nevis tourist route requires precise compass work.
The Descent Bearing:
If you cannot see the path, you must follow strict bearings to avoid the gullies. From the summit trig point, walk on a Grid Bearing of 231° for exactly 150 metres. This takes you safely past the top of Gardyloo Gully. Then, turn to a Grid Bearing of 282°. Follow this bearing until the path becomes obvious and you begin to descend the zig-zags. Failure to follow these bearings on a Ben Nevis day hike can lead you directly over the cliffs or into the steep, loose scree of Five Finger Gully.
Weather on the Ben Nevis walking route is notoriously “ferocious.” Winds can exceed 50mph even when the glen is calm, and snow can fall in any month of the year. Before starting your Ben Nevis walk, consult the Mountain Weather Information Service (MWIS). If the forecast predicts gale-force winds or lightning, the Ben Nevis Mountain Track should be avoided. Remember the mountain’s golden rule: the summit is only the halfway point. Many accidents occur during the descent due to “summit fever” and subsequent leg fatigue.
Safety, Planning and Mountain Advice
Completing the Ben Nevis Mountain Track safely requires more than just physical fitness; it requires a mountaineering mindset. Even though it is the Ben Nevis tourist route, you are entering a remote and hostile environment. Lochaber Mountain Rescue (Lochaber MRT) is a volunteer organization that handles hundreds of calls on “The Ben” each year. To avoid becoming a statistic, follow these safety protocols:
- Carry the “Essential Ten”: Map, compass, whistle, headtorch (with spare batteries), extra food, water, waterproof jacket and trousers, hat, gloves, and a survival bag.
- Clothing: Avoid denim and cotton, which hold moisture and lead to hypothermia. Use a layering system with synthetic or wool base layers.
- Footwear: Sturdy, waterproof hiking boots with ankle support are non-negotiable for the Ben Nevis walking route. Trainers are unsuitable for the sharp boulders of the upper track.
- Timing: Start your Ben Nevis day hike early. In winter, this means being off the mountain by 3:00 PM. In summer, allow at least 8 hours of daylight.
- Communication: Do not rely on mobile phones. Signal is patchy, and cold temperatures drain batteries rapidly. Carry a dedicated GPS or, better yet, the skills to use a map and compass.
If you are new to the Scottish Highlands Day Hikes, consider hiring a professional guide from Mountaineering Scotland. They can provide the navigation expertise needed to handle the Ben Nevis Mountain Track in sub-optimal conditions. For those looking for a slightly less demanding but equally iconic peak, the Ben Lomond walk in the Trossachs is an excellent alternative to the Ben Nevis walk. In addition to these well-known routes, the Scottish Highlands offers a variety of scenic hikes that cater to different skill levels and preferences. Many trails wind through lush forests, alongside shimmering lochs, and up to breathtaking viewpoints. Whether you’re seeking solitude or adventure, exploring these scenic hikes in the Scottish Highlands ensures an unforgettable experience amidst stunning landscapes.
Ultimately, the Ben Nevis walking route is a bucket-list achievement for many. By treating the Ben Nevis tourist route with respect, planning for the worst weather, and mastering basic navigation, you can ensure that your Ben Nevis day hike is a memorable and safe experience. The mountain will always be there; if the clouds are down and the wind is howling, there is no shame in turning back at the Red Burn and saving the Ben Nevis Mountain Track for another day.
