
Introduction: From Daunted to Confident
Ever unfolded a crisp Ordnance Survey map and felt a sudden chill of apprehension? All those intricate lines, symbols, and numbers can seem like a secret language. You’re not alone—many aspiring hillwalkers initially feel overwhelmed, wondering if they’ll ever make sense of it all.
Here’s the crucial truth: mastering OS map reading is the single most foundational element of safe decision-making when hiking in the UK. From the gentle South Downs to the dramatic peaks of Snowdonia and the Scottish Highlands, our hills are renowned for unpredictable weather and challenging terrain. When your phone battery dies or the signal vanishes, a paper map—correctly understood—remains your reliable, always-on guide.
This guide will demystify the OS map, transforming that intimidating sheet into your most trusted companion. We’ll break down the essentials step by practical step, starting with the basics—understanding symbols, scales, and contour lines—before moving on to route planning and advanced navigation techniques. By the end, you’ll not only feel confident navigating but also empowered to make smarter, safer decisions on the trail.
Here at UltralightHike, we also believe that deep map knowledge translates directly into smarter, lighter packing. When you understand the terrain intimately, you can prepare effectively without carrying unnecessary weight.
Ready to crack the code? Let’s turn that map from a mystery into your ultimate hiking ally.
Key Takeaway: Reading an OS map requires interpreting scale, symbols, and contour lines to understand terrain and legal access. By combining grid references for location with contour analysis for elevation, hikers can navigate safely across diverse UK landscapes without relying solely on digital devices.
Understanding OS Map Scales: Explorer vs Landranger
The first step in mastering How to Read an Ordnance Survey Map for Hiking is choosing the correct scale for your journey. Ordnance Survey (OS) produces two primary map series designed for outdoor recreation: the Explorer and the Landranger. Each serves a distinct purpose based on the level of detail required for the terrain.
The OS Explorer series uses a scale of 1:25,000, where 4 centimetres on the map represent 1 kilometre on the ground. These maps are easily identified by their orange covers. They are the gold standard for hikers because they show every field boundary, footpath, and significant rock outcrop. When navigating complex terrain like the Scottish Highlands or the Peak District, the 1:25,000 scale provides the granular detail necessary to identify small features that confirm your position.
The OS Landranger series uses a scale of 1:50,000, where 2 centimetres represent 1 kilometre. These maps have pink covers and cover a much larger geographical area than the Explorer series. While they lack the fine detail of field boundaries, they are excellent for long-distance walking, cycling, or planning broad routes across counties. For most hikers, the Landranger is a secondary tool, useful for seeing the “big picture” of a mountain range or forest.
Choosing between them depends on your environment. In low-visibility conditions or intricate moorland, the Explorer map is essential. The additional detail helps in Grid References and Bearings for Hiking UK, ensuring that your calculated position matches the physical landmarks around you. Conversely, if you are walking a well-marked National Trail over several days, a Landranger map might reduce the number of physical maps you need to carry.

Rights of Way and the CRoW Act
In the United Kingdom, understanding where you are legally allowed to walk is as important as knowing where you are physically. OS maps use a specific colour-coded system to denote different types of public rights of way. These are represented by green symbols on Explorer maps and red symbols on Landranger maps.
A short-dashed green line indicates a public footpath, which is open only to walkers. A long-dashed green line represents a bridleway, which can be used by walkers, horse riders, and cyclists. Green circles or “byway” symbols indicate routes open to all traffic, including motorised vehicles, though these are increasingly rare in sensitive areas. It is vital to stay on these paths when crossing private farmland to respect the work of local farmers and land managers.
The Countryside and Rights of Way (CRoW) Act 2000 introduced “Access Land,” often referred to as the “Right to Roam.” On an OS Explorer map, this land is shaded with a light yellow or beige wash and bordered by a thick brown line. Within these areas, you are generally free to walk off-path. This is common in the fells of the Lake District and the moors of Yorkshire. However, Access Land can be subject to temporary closures for grouse shooting, lambing, or conservation, so checking local signage or the Natural England website is recommended. When exploring Access Land, it’s important to be well-prepared, especially if you plan to venture out for a longer hike. Carrying hiking snacks for longer trails can help maintain your energy levels and enhance your overall experience. Always remember to respect the land and wildlife while enjoying the freedom to roam.
Understanding these boundaries is a core part of What to Do If You Get Lost Hiking UK. If you find yourself on the wrong side of a boundary or on a path not marked as a right of way, you may be trespassing. Recognising the difference between a permissive path (where the landowner allows access) and a statutory right of way ensures you remain within the law while enjoying the outdoors.
Access rules vary across the UK
- England & Wales: The CRoW Act created mapped “Access Land” (often shown with a pale wash on OS Explorer maps). Rights of way (footpaths/bridleways/byways) are key on farmland.
- Scotland: Access works differently — outdoor access is generally broader under Scottish access rights, and you’re expected to follow the Outdoor Access Code. OS maps still help, but you’re not relying on the same rights-of-way network as England & Wales.
- Northern Ireland: Access is more limited and can be less clearly defined than Great Britain in places, so extra care is needed with land ownership and local signage.
Interpreting OS Map Symbols for Hikers
The legend of an OS map is a dense dictionary of symbols that describe the physical and man-made world. For hikers, certain symbols are more critical than others. Water features, such as streams (blue lines), lakes, and marshes, are essential for navigation and safety. A stream that appears small on a map may become an impassable torrent after heavy rain, a common occurrence in UK mountain environments.
Vegetation symbols help you anticipate the effort required for a route. Coniferous forests are shown as dark green pointed tree symbols, while deciduous woods are rounded. Areas of bracken, heath, or marsh are indicated by specific tuft-like symbols. Knowing you are entering a marshy area allows you to prepare for difficult underfoot conditions or choose an alternative route to stay dry and safe.
Man-made features serve as excellent “tick-off” points. Trig points—small blue triangles with a dot in the centre—represent concrete pillars used in the original surveying of the UK. These are usually located on summits and provide definitive confirmation of your location. Other useful symbols include pubs (a blue beer glass), parking (a blue P), and emergency help points / refuge / bothy / car park / road access, which can be vital in emergencies where mobile signal is non-existent. Always refer to the map legend if you encounter an unfamiliar symbol, as it could represent a hazard like a quarry or a steep cliff edge.
Mastering Contour Lines and Terrain
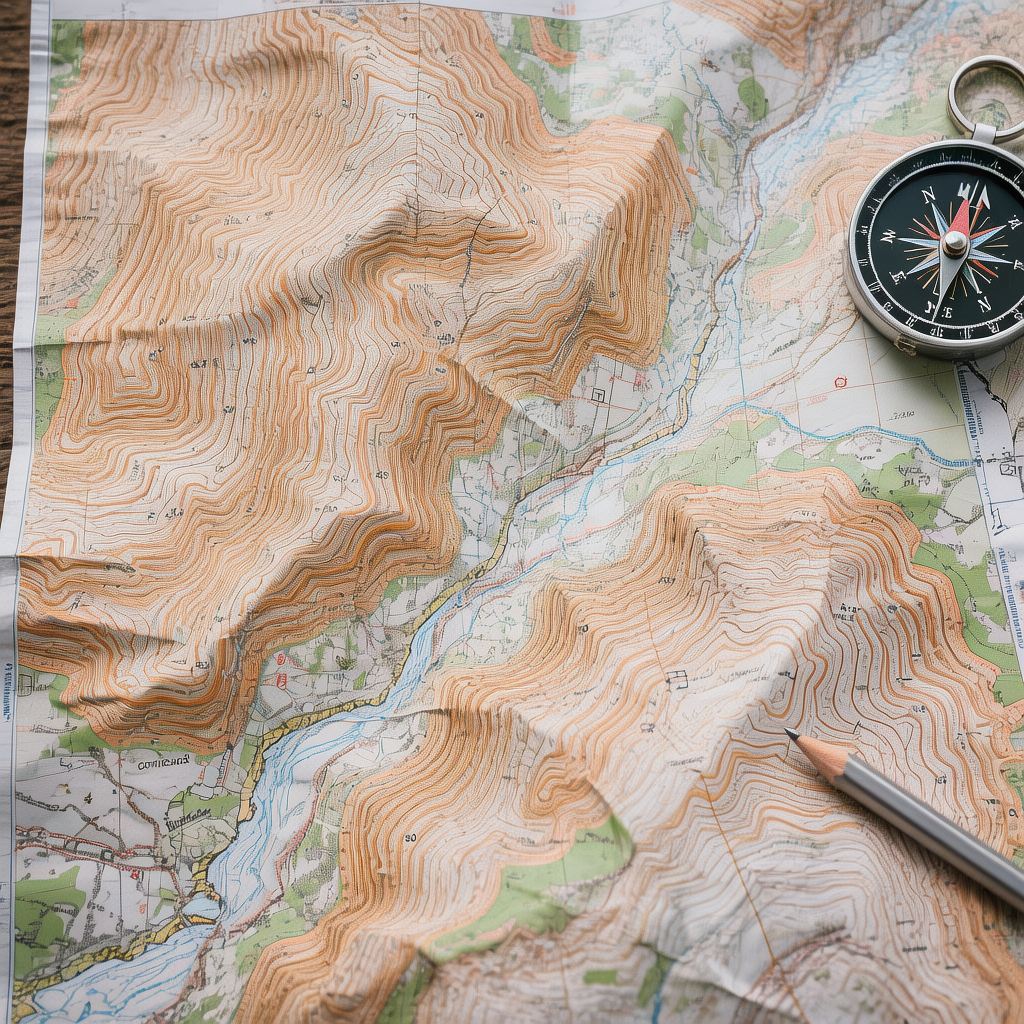
Contour lines are the most important feature for understanding the shape of the land. These thin orange or brown lines join points of equal height above sea level. On an OS Explorer map, they are usually drawn at 5-metre or 10-metre vertical intervals. The closer the lines are together, the steeper the slope. If the lines are far apart, the ground is relatively flat.
Every fifth line is drawn thicker; these are called index contours and often have the elevation height printed on them. By reading these numbers, you can determine if you are climbing or descending. For example, if the numbers increase as you move forward, you are going uphill. This is critical for pacing and energy management. A route that looks short on paper but crosses dozens of tightly packed contour lines will be significantly more taxing than a longer, flatter alternative.
Contour patterns reveal specific landforms. A series of V-shapes pointing uphill indicates a valley or a re-entrant, often containing a stream. V-shapes pointing downhill indicate a spur or a ridge. Small concentric circles represent a hilltop or summit. Recognising these patterns allows you to “see” the hills before you reach them. This skill is vital when Using a Compass for Navigation UK, as it allows you to correlate the physical slope you are standing on with the map’s representation of that slope.
The National Grid and Grid References
The British National Grid is a system used to pinpoint any location in Great Britain with high precision. The entire country is divided into 100km by 100km squares, each identified by two letters (e.g., NY for the central Lake District or SH for Snowdonia). These letters are found in the corners of the map and are essential for giving your location to Mountain Rescue England & Wales in an emergency.
Within these squares, the map is criss-crossed by blue grid lines. The vertical lines are called Eastings (because they increase in value as you go East), and the horizontal lines are called Northings (increasing as you go North). To give a four-figure grid reference, which identifies a 1km square, you find the Easting line to the left of your point and the Northing line below it. Always remember the rule: “Along the corridor and up the stairs.”
A 6-figure grid reference gives your position to the nearest 100 metres. Find the 1 km square your feature sits in, then:
- Read the easting (the number on the left grid line) first.
- Read the northing (the number on the bottom grid line) second.
- Add a third digit to each by estimating tenths across/up the square.
Example: between Eastings 32–33 and Northings 45–46:
If it’s about 7/10 up, the northing becomes 457
So the grid ref is 324 457.
If it’s about 4/10 across, the easting becomes 324
Relating the Map to the Ground
The ultimate goal of learning How to Read an Ordnance Survey Map for Hiking is the ability to relate the paper map to the physical world around you. This process begins with “orientating the map.” This means turning the map so that the north on the map (the top) points to the actual North. You can do this using a compass or by aligning the map with obvious linear features like a road, a wall, or a distinct ridgeline.
Once the map is orientated, features to your left in the real world will be to the left on the map. This makes navigation intuitive. A common technique is “thumbing the map,” where you fold the map and place your thumb on your current location. As you move, you move your thumb along the route. This prevents the common mistake of losing your place and having to re-navigate from scratch.
Another advanced technique is “handrailing.” This involves following a linear feature, such as a fence, a stream, or a forest edge, that runs parallel to your desired direction of travel. Handrails provide security, especially in poor visibility. Similarly, “aiming off” is a technique where you deliberately aim to one side of a target feature (like a bridge or a path junction) so that when you hit the linear feature it sits on, you know exactly which way to turn to reach your destination.
Common Beginner Mistakes in UK Navigation
Even experienced hikers can make errors when tired or in bad weather. One of the most frequent mistakes is failing to account for the scale of the map. On a 1:50,000 Landranger map, a small-looking distance can actually be a significant walk. Beginners often underestimate how long it will take to cross rugged terrain, leading to “benightment”—being caught out after dark without proper equipment.
Another error is “map-to-ground” confusion, where a hiker sees a feature, like a lake, and assumes it is the one on the map without verifying surrounding details. This is known as “confirmation bias.” To avoid this, always look for three independent pieces of information to confirm your location: for example, a stream crossing a path, a specific slope aspect, and a nearby wall junction. If only two match, you may not be where you think you are.
Relying solely on GPS or smartphone apps is a modern hazard. Electronic devices can fail due to battery drain in cold weather, water damage, or loss of signal in deep valleys. An OS map does not require batteries and is the only 100% reliable navigation tool. Always carry a physical map and compass, and ensure they are protected in a waterproof map case. If you do find yourself disoriented, stop immediately. Do not keep walking in the hope of finding a familiar landmark; instead, use the skills outlined here to re-establish your position.
Connecting Map Skills to Weather and Safety
Map reading is not an isolated skill; it is deeply connected to weather awareness and emergency preparedness. The UK’s mountain weather is notoriously volatile. Before heading out, hikers should check the Met Office Mountain Forecast. If the forecast predicts low cloud or heavy rain, your map reading skills will be tested as visual landmarks disappear. Additionally, it’s crucial to be prepared for unforeseen circumstances by carrying hiking first aid essentials. A well-stocked first aid kit can make a significant difference in emergencies, especially when navigating through unpredictable terrain. Ultimately, combining map reading skills with weather awareness and preparedness ensures a safer and more enjoyable hiking experience.
In low visibility, contour interpretation becomes your primary navigation method. You must be able to feel the slope under your feet and match it to the map. If the map shows you should be on a gentle downhill slope but you are climbing, you have deviated from your route. This “slope aspect” navigation is a life-saving skill in the mist of the Scottish Cairngorms or the Welsh Carneddau.
Emergency navigation also requires knowing how to find the quickest, safest route off the hill. This isn’t always the way you came. A map allows you to identify “escape routes”—lower-level paths or valleys that lead to safety while avoiding steep crags or swollen rivers. In an emergency, being able to provide a 6-figure grid reference to emergency services can be the difference between a swift rescue and a prolonged search. Always keep your map accessible, not buried at the bottom of your rucksack.
Emergency quick steps (UK):
- Stop, shelter, and get safe from wind/exposure.
- Take a 6-figure grid reference from your OS map.
- Call 999 or 112, ask for Police, then Mountain Rescue (explain your grid ref + what’s happened).
- Keep the phone warm, conserve battery, and stay put if moving increases risk.
Practical Exercises for Improving Navigation
The best way to become proficient at How to Read an Ordnance Survey Map for Hiking is through consistent practice in low-stakes environments. Start by taking an OS map on local walks in familiar parks or woodlands. Try to identify every symbol you pass and practice taking 6-figure grid references for specific trees or benches. This builds the “muscle memory” needed for more challenging environments.
Practice “mental mapping” by looking at a section of the map and trying to visualise the terrain in 3D. Then, walk that section and see how well your visualisation matched reality. Pay close attention to the timing. Most hikers walk at about 4km per hour on flat ground, adding 1 minute for every 10 metres of ascent (Naismith’s Rule). Use your map to calculate how long a leg of your journey should take and use a watch to track your progress.
Finally, consider attending a formal navigation course. Organisations like Mountain Training UK & Ireland offer National Navigation Award Scheme (NNAS) courses that provide hands-on instruction from experts. These courses cover everything from basic map symbols to complex relocation techniques in the dark, providing the confidence needed to explore the UK’s most remote and beautiful landscapes safely. In addition to map reading, these courses also emphasize essential compass navigation techniques in the UK, ensuring participants can effectively orient themselves in various terrains. By mastering these skills, adventurers are better equipped to tackle challenging routes and navigate through unfamiliar areas with assurance. Ultimately, investing time in formal training can transform a novice hiker into a capable outdoor enthusiast ready to embrace the wilderness.
Frequently Asked Questions
What is the difference between magnetic north and grid north?
Grid north is the direction of the blue grid lines on an OS map. Magnetic north is where your compass needle points. The difference is called magnetic variation (declination) and it changes by location and year. For accurate bearings, check the north points diagram in the map margin and adjust your compass accordingly (especially on longer legs).
Can I use a 1:50,000 map for mountain hiking?
While possible, it is not recommended for beginners or for use in complex terrain. The 1:50,000 Landranger map lacks the fine detail of crags, small streams, and field boundaries found on the 1:25,000 Explorer map. In the mountains, these small details are often the only way to confirm your exact location, especially when visibility is poor.
How do I know if I am going uphill or downhill using contours?
Look for the numbers printed on the thicker index contour lines; these indicate the height above sea level in metres. If the numbers are increasing in your direction of travel, you are going uphill. Additionally, look for water features; streams always flow downhill, so if you are walking away from the source of a stream, you are likely descending.
What should I do if my map gets wet?
Standard paper OS maps will disintegrate if they get wet. It is essential to use a waterproof map case or purchase the “Active” version of OS maps, which are plastic-coated and weather-resistant. If a paper map does get damp, avoid folding or unfolding it until it has dried, as the paper becomes extremely fragile and will tear along the fold lines.
